The next thing I knit was the Slushies Top from We Are Knitters (WAK). They claim this one is advanced, presumably because there’s actual shaping around the neck and shoulders. But I also thought this was fairly easy, except for the things they left unspecified in the pattern 😡 and, honestly, those parts were fairly straightforward, too, once I found decent instructions online.
Once again, I ended up making the top, deciding it wasn’t quite right, and making it again. So frustrating, but maybe I’m getting better at figuring this out earlier? Here’s me in my version of this, that adheres to the pattern:


Mostly, I thought it was wayyy too long. It might have been fine tucked into pants, but the fabric is too thick for that to tuck in for actual wear. I should have been able to figure this out based on others’ Instagram pictures since you could only see two diamonds up the front in all the pictures where I thought it looked good.
Although it wasn’t specified in the pattern, I also learned to do angled cast-offs to make the neck round, and I was super proud of this. It bugs me that this company is making patterns for new knitters but not drawing attention to details like this. It looks way better than it would have with a stair-step-y edge, and wasn’t all that difficult. But figuring out what terms to search for to find good tutorials on how to do this was difficult. I used this tutorial for the front. And this one for the back (from WAK, so their instructions could have pointed me to something on their own site 🙄) along with other google searches for “short rows” because their tutorial left a little to be desired.
I’m also fairly annoyed that their pattern included the two symbols \ and / but only defined one of them as a k2tog (knit two together). It was non-trivial to figure out the correct google search to tell me that the other one was a ssk (slip two knitwise one at a time, then knit them together). Mostly, this doesn’t matter, but when there are a bunch of them on subsequent rows in about the same spot, one of them creates a line that leans left, and the other creates a line that leans right. So my shaping around the arm holes would have looked very asymmetrical. They could have solved this with one very simple addition to the key for their pattern.
The other thing I didn’t like is that the diamonds don’t line up quite right. Look at the green line in the image on the left below. See how there’s a break in it? See how the blue line is where the diamonds should continue, but they don’t? Not good. And then if you look at the other pink lines, you start to notice it’s all over the whole top, and more obvious in some places than others. It also results in these weird cut-outs from the diamonds like in the image on the right below. If I was going to take the thing apart and re-do it, I was going to fix that issue.


This re-do was a major process. I found a different pattern that had substantially smaller diamonds but that came together at a point. I can’t find it again now, but here’s a Google Sheet with the pattern I created and followed to get my final shirt. I also followed the WAK directions for finishing the neckline, but I think this wasn’t necessary since I learned to shape the neck nicely.
And here’s the finished product:
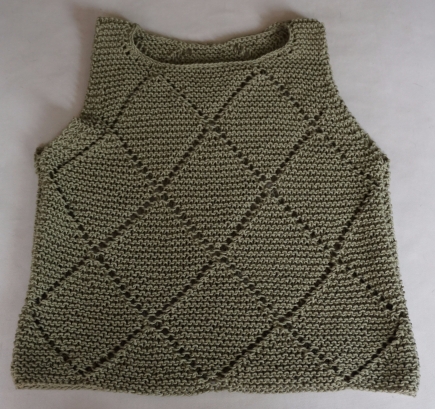
I think it came out a little shorter and narrower than ideal, but it’s much more wearable than my original instantiation of it, and adapting the diamond pattern to slight changes in width/height was not easy. Since it’s smaller than the WAK pattern, this is probably do-able with two skeins of WAK cotton. I had a lot left over.
Before taking it apart, I went to Jo-Ann’s and bought some other yarn, thinking that I might re-do it with different yarn so I didn’t have to take apart the top I’d spent so much time on. But working with that yarn was awful. It felt like crap on my hands and didn’t seem like it was going to lead to a satisfying finished product.
I also tried, in my second version, to make a rounded hem like this …
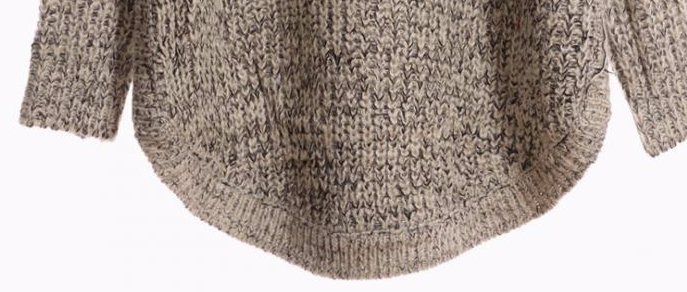
… by following these directions, but it did not look good in garter stitch. I’ll save that one for another time.
Here’s what I learned and/or would do differently in the future:
- Shaping arm holes and necklines isn’t that hard (but does take concentration and math when creating the pattern).
- Again, adapting patterns is totally possible.
- I think hemlines need to be more substantial, so I would do something different down there next time.
- Taking off length also takes off weight, so the top is shorter than you might expect (because it’s not being pulled down as much). I’m not sure how to fix this still.
- This neck is the exact same size as the WAK neck opening because it was a little tight even in the original. I would make the neck bigger next time.
- I didn’t bother trying to learn a seamless stitch for connecting two pieces of garter up the side. I watched one video and then gave up. Maybe next time.
- I learned to knit short rows (for the neck and hem, even though that wasn’t successful).
- I learned to use good yarn.
- I thought I learned my lesson and decided to move on from WAK, but apparently not.

Pingback: Knitting Journal (4) | Camille Cobb
Hey Camille!
Thanks for sharing the google docs file you made up to modify the pattern for you. I can definitely see how it’ll make the diamonds better lined up. You mentioned the the original pattern resulted in a too that was too long. I’m going to aim to make mine shorter. I was wondering what size pattern did you follow in the original version you made and what size shirt do you normally wear? I often wear a medium size shirt, but I ordered the large kit (4 skeins instead of 3) intending to follow the large pattern, now I’m thinking that I should just make it a medium or possibly a small. Do you have the measurements of your finished top? Any suggestions on sizing would be much appreciated.
Thanks you,
Nova
LikeLike
Hi Nova,
I’m glad it’s helpful. I followed the small pattern and usually wear xs or small tshirts. I don’t have measurements unfortunately, and I left the top at my parents’ place last time I visited, so I won’t be able to get it for a while.
I think the length is really tricky, because even just a few extra rows adds quite a bit of weight and so then it gets pulled down and stretched to be longer than you’d expect. And also since the fabric is so thick, I don’t think it looks/feels good tucked in. So getting the length somewhere between “doesn’t expose my stomach” and “doesn’t cover half my butt” while aiming to have no diamonds cut in half is pretty tough.
Since it sounds like you’ll probably have quite a bit of extra yarn, you might consider knitting a big piece for gauge (also, the yarn seems to do pretty well with being taken out and re-knit). I’d compare to a top that is a length you like (and then subtract a bit more to account for stretching … I didn’t do this at all scientifically).
Alternately, another way to fudge the length a little (if you’ve finished knitting it and it’s shorter than you’d prefer) would be to just knit a few extra rows at the top of the straps. This top has a pretty narrow head opening, so that might actually be a good thing from that perspective as well.
I hope yours comes out well and that this is useful!
Camille
LikeLike
Thanks so much for the feedback Camille!
If it wasn’t for this blog post, I might not have noticed how wonky the diamond alignment was until it was too late. I’ve borrowed your Google Sheet to create one for me that’s a medium size. It’s actually turned out to be a great exercise in pattern design.
I know, I know I should knit a swatch first but I always get too excited to get started. So we’ll see how this one turns out! I’ll keep an eye out and be ready in case it starts to get too long.
I’ll make sure to link to this blog post when I’m all done and post it on my Ravelry account.
LikeLike
Hi!
I am so glad I came across your article. I like the slushies top, but like you said, in all the IG photos it looks way toooo long which turned me off of it! I really like your version of it, are you willing to share the pattern you made?
LikeLike
Hi! I mostly wrote this so that I’d have it to come back to later since I often take looong breaks between knitting projects, but I’m so glad it’s been useful for other people! A link to the version I made for myself is in this writeup somewhere, but it might be hard to find. It’s here: https://docs.google.com/spreadsheets/d/1-7_kv7dVcyriUljVHD6ErAxQ9Sq25NShXTxEWEK_OT4/edit?usp=sharing
The previous comment/reply conversation has a few thoughts on how to adjust the sizing and what I might have done differently 🙂
LikeLike
In case anyone is wondering, here’s how mine turned out: https://www.ravelry.com/projects/novastarr/slushies-top
LikeLike
I was wondering 🙂 yours came out great!! I love the color you picked, too!
LikeLike